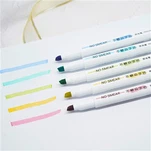
Marker pens is widely used in design, illustration, diary and so on because of its bright color, fast coloring and strong expression. Mastering the correct usage of skills can significantly improve the effectiveness of work. Here's a detailed guide to how to usage techniques:
I. Basic Operating Techniques
Pen Holding Posture:
Natural grip: Hold the pen like a normal pen and gently squeeze the pen holder between the thumb, forefinger and middle finger to loosen the wrist.
Angles: The pencil holder should be held at an angle of about 45° to the paper to control the direction and pressure of the stroke.
Avoid too much pressure: Marker nibs is too soft and too much pressure can damage the nib or cause ink to bleed.
Pen Application Techniques:
Single Color Gradient: Sweep the paper quickly and evenly to avoid reuse (this can lead to bristles or streaks).
Gradient Effects:
Monochromatic Gradient: The gradient is achieved with the same stroke by adjusting pressure (light → heavy) or layering.
Different Color Gradient: Apply light first, then dark when halfdry, gently blending the transition with the tip of the pen.
Brushstroke Variations:
Edging: Use the side of the pen tip to sweep the paper and draw a wide line (suitable for large areas of colour).
Center stroke: Use the tip of a pen to draw fine lines perpendicular to paper (suitable for detail drawing).
Rotate the tip: Fiber tip markers allow you to create lines of different widths by rotating the tip.
Layering Techniques:
Dry layer: After the first layer of ink is completely dry, add a second layer of ink (avoid color mixing and opacity).
Wet Layering: Fast layer 2, while the first layer is still wet; suitable for creating a natural blending effect (such as watercolor).
Utilizing Transparency: Alcohol based markers are highly transparent and color depth can be regulated by layering.
II. Advanced Techniques:
Light Stereo:
_Three Fives: _
Highlights: Use light or white spaces.
Midtones: A color that is gray in use or similar to a layer.
Dark: Emphasis on dark gray or contrasting colors.
Highlights: Complete with a white highlighter or correction fluid. Projection processing: Use a color one layer deeper than the object to draw the projection, making sure the projection direction is consistent with the light source.
The edges of the projection can be appropriately blurred (using dry layering techniques or mixed brushes).
Material Representation:
Metallica: First apply a light gray base, then layers of dark gray and black reflective areas.
Leave highlights blank or illuminate with a white highlighter.
Glass: Use light blue or grey to represent transparency and darker colours to outline the edges.
Add white or light colors to highlight reflective areas.
Fabric: Use a soft brush to depict wrinkles and avoid rough lines.
Light fabrics can be layered with a small amount of ambient color,such as a warm reflection of the ground.
Special effects:
Watercolor Effect: After colouring with an alcohol-based marker, mix the edges with a brush dipped in water (similar to watercolour diffusion).
Suitable for depicting natural scenery such as sky and clouds.
Scratch effect: When the ink is semi-dry, use a toothpick, blade or cardboard to scrape off the texture (such as wood grain or stone). Salt Sprinkling Effect: Scatter a little salt over wet ink, dry it, then shake it off to create a snowflake texture (perfect for snow scenes).
III. Practical Tips and Preventive Measures
Paper Selections
Smooth paper: such as tracing or marker paper, ink does not ooze easily, color saturation is high.
Coarse paper: such as watercolor paper, ink will disperse, suitable for depicting specific textures (dosage to be controlled).
Avoid common printing paper: easy to hairy and bleeding, affecting the printing effect.
Color Matching
Monochromatic Color Layering: Layer different hues of the same color system to create a depth of feeling (e.g. light blue → dark blue).
Contrast Color: Add a few contrasting colors (such as red and green) to the main color color scheme to enhance visual impact.
Use grayscale: Professional markers (such as COPIC) have a rich grayscale range and are suitable for depicting light and three-dimensionality.
Correction and adjustment
Wrong coverage: Cover the incorrect area (until completely dry) with a dark marker of the same colour series.
White highlighter: used to correct details or add highlights (e.g. eyes, metallic reflections).
Eraser: For uncolored pencil sketches only, cannot be erased after coloring.
Maintenance and Care
Quick change of cap: Alcohol-based marker ink is volatile; caps must be placed immediately after use.
Vertical storage: Avoid placing pen tip down to prevent ink from settling or tip deformation.
Wash the nib regularly: gently wipe the nib with an alcohol swab to remove dried ink (oily marks require a special cleanser).
IV. INTRODUCTION Different Scenario Application Techniques
Architecture/Interior Design
Perspective Assist: First, draw perspective lines with a pencil, then color with a marker to ensure accurate spatial representation.
Material Differentiation: Use different strokes to represent materials such as walls, floors and furniture (such as short curves of wood grain, smooth color blocks of glass).
Integrated ambient color: Add a small amount of ambient color (such as warm colors reflected from the ground) to a dark area of an object to enhance the sense of reality.
Anime/Illustration Design
Line art optimization: First, outline with a fine line pen, then use a soft line pen to depict details such as hair strands and folds of clothing.
Color Layering: First, apply base colours, then dark colours to represent shadows, and finally light colours to highlight highlights.
Background processing: Quickly place colors with foam markers, then add details (such as trees and clouds) with fiber markers.
Journal/Decorative Painting
Theme Color Scheme: Choose a color scheme based on the magazine's theme (e.g. red and gold for holidays, blue and green for travel).
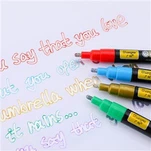
Text Decoration: Write the title with a marker pen, then outline it with a highlighter or metal pen to enhance the stereo effect.
Application of sticker: Use sticker after coloring to avoid blurring important lines or colors.
V. Common problem-solving
Ink bleeding:
The reason: paper absorbent or pen pressure is too big.
Solution: Use smooth paper or a tissue to gently press the bleeding area to absorb the ink. Uneven color:
The reason: slow strokes or repetitive strokes.
Solution: Swipe the pen across the paper quickly and evenly, avoiding pauses or return strokes.
Dried pen tip:
The reason: Long-term disuse or ink evaporation.
Solution: Shake a pen or wipe pen tip with an alcohol swab. Oil-based markings require to be refilled with special ink.
Smudged color layering:
The reason: First layer is not completely dry or the color is not chosen properly.
Solution: Wait until the first layer is completely dry before adding another, or choose a highly transparent alcohol-based label.

Marker Pen Usage Tips
Mar 01, 2026


Send Inquiry
Latest News